Locator
Organize and find your stuff
Organize and find your stuff
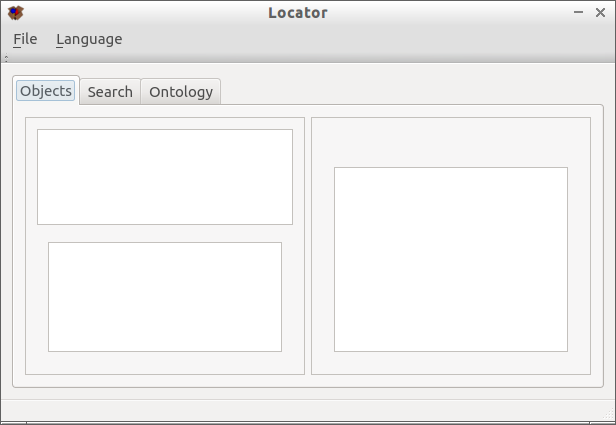
Once you start the application, you'll see the main interface:
In the Language menu, one can choose between (hopefully among) the available translations.
In the File menu, there are the usual posibilities.
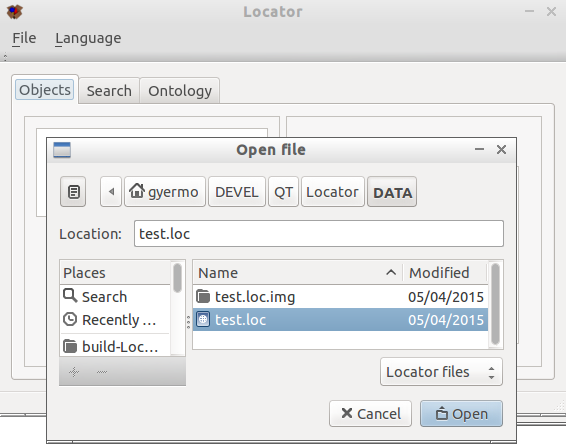
Just open the example file named test.loc in the
DATA directory inside the source tree to see how
the program works:
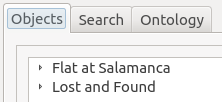
Once opened, let's focus on the available tabs: Objects, Search, and Ontology. When you start the aplication, the first one is selected.
This tab is aimed at navigating your objects and locations. In the upper left pane, a tree-like structure allows you to locate whatever object your application is aware of. In the example file, you can see two entries: Flat at Salamanca and Lost and Found. The latter is a special place where all objects that aren't in a known location are placed. This special place can't be renamed or deleted.
You can expand or collapse branches in the usual way. Let's
expand the Lost and Found place to find an object named
ThreeStars television set. Click on it to select that
item.
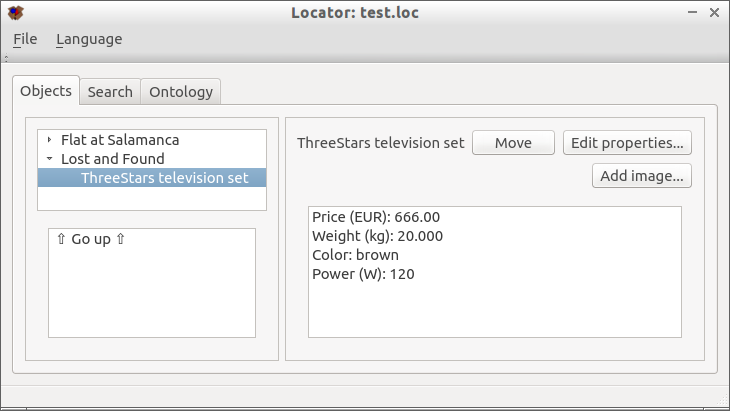
On the pane on the right, the name and the properties associated
with the object appear. There is also another pane just below
the navigation tree one. To see the purpose of this pane, click
on Flat at Salamanca:
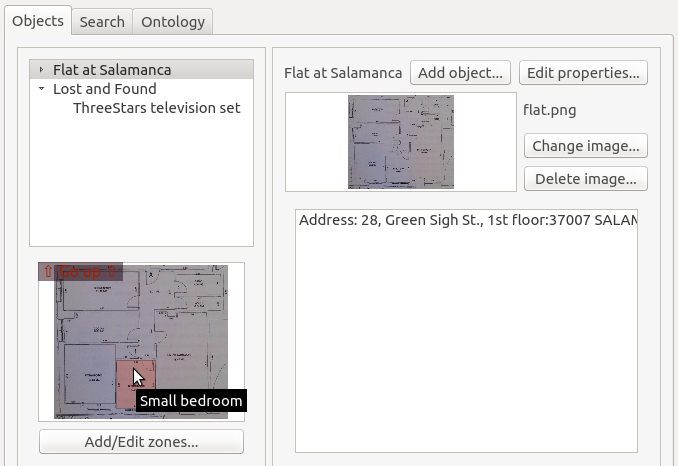
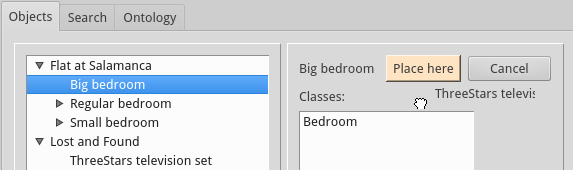
Besides being another way to navigate objects and locations, in this pane an optional picture of the object can be shown. If that is the case and the object is a container, you can configure the picture so that you can navigate by clicking on it. A tooltip is shown in the active zones, like the one shown in the example image above.
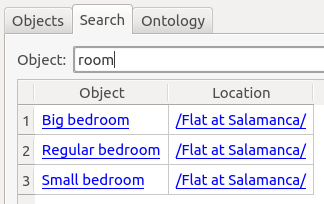
The purpose of the search tab is to find objects. Once the search key is input, a list with the matching objects and their locations appear. Both objects and locations are links and, if clicked, lead to the first tab, with the relevant object selected.
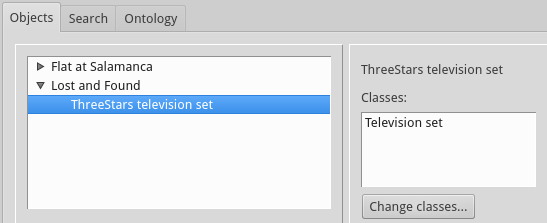
Objects can belong to one or several classes. For instance, object ThreeStars television set is a television set and, thus, belongs to the Television set class, as can be seen on the picture on the left.
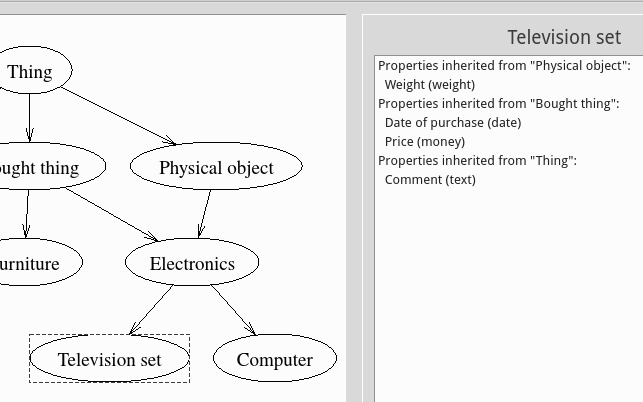
Classes, however, aren't isolated from one another and form a hierarchical structure, with more general classes at the top and more concrete classes sprouting from them. That hierarchy of classes form an ontology and that ontology can be seen in the Ontology tab for the file in question.

Ontologies have an obvious implication: if one object belongs to a class, it automatically belongs to all the ancestors of the class. In the example we are dealing with, the ThreeStars television set is a Television set, but that implies that it is also Electronics, a Physical object, a Bought object, and eventually a Thing.
A class may provide an object with none, one or several properties. Clicking on the name of a class, we can see the properties an object get because of belonging to that class. In the example, the Television set class provides no property, but some of its ancestors provide some, as can be seen in the picture:
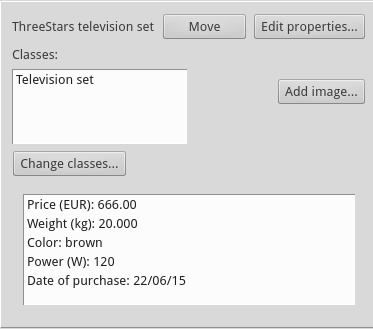
Objects have properties. Some of them are provided by the classes they belong to. But those properties provided are only hints. Objects aren't obligued to define all possible properties, but some. Even more, they can also add custom properties on their own. We can see the properties of our dear ThreeStars television set on the image on the left.
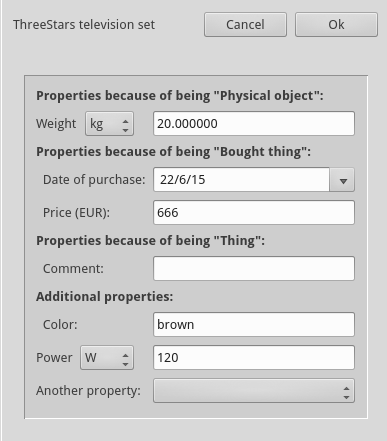
If you click on the Edit properties... button, you get, guess what, a way to edit the object properties, as shown on the right picture. You can even add additional or custom properties to the object.
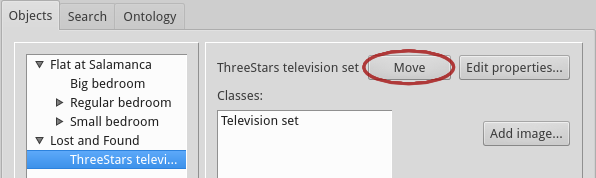
There is a relevant button labeled Move to move objects around. By clicking on it, the cursor changes shape to that of a grasping hand. You can then navigate to the place you want to put the object in or, alternatively, cancel the procedure.
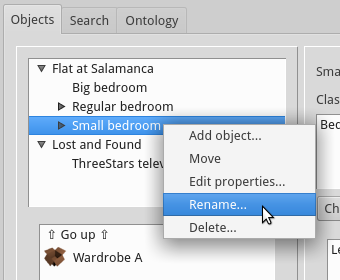
In order to rename or delete an object, one has to open a context menu on the upper left pane by clicking with the alternative (usually the right) mouse button.
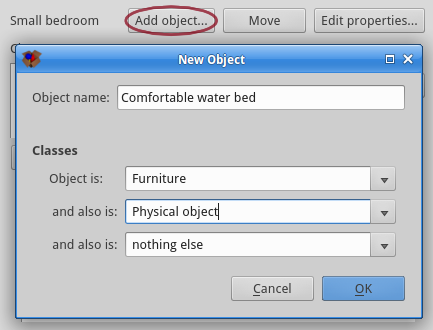
For adding an object, one has the choice of the context menu or a button. A dialog similar to the one shown on the right will appear. After typing the name of the new object, you have to choose the classes it belongs to. Once chosen the first class, in the following list will only appear the relevant options considering the ontology. For instance, if you choose Electronics as your first option, then you won't have the choice of the ancestors of Electronics (Bought thing, Physical object, and Thing), because all Electronics objects are, by definition, bought things, physical objects, and things. But, beware, all descendants of the class won't also appear in the second list (Television set and Computer). If you have a computer, don't choose Electronics as the first option, but Computer. As a side effect, the object will also inherit the properties of Electronics.
Pay attention to the new name of the object you are renaming or adding anew. At least in the version of the program at the time of writing this, no two objects can have the same name.
When trying to delete a container that it isn't empty, you will be asked if you want to delete its contents too or, alternatively, place those objects just outside the container you are deleting.
Some objects or containers can't be moved, renamed or deleted. In that case, the relevant options won't hopefully appear.
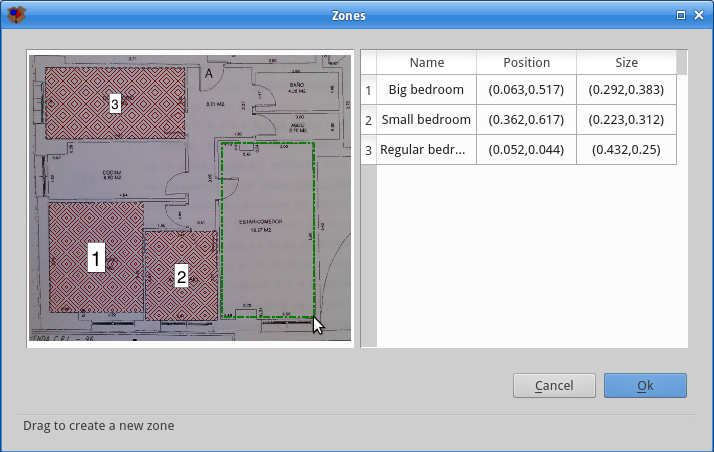
As already said above, objects and containers can have images. In the latter case, zones can be defined in the image so that when hovering the mouse the zones are highlighted and, if clicked, they can lead to other objects or containers.
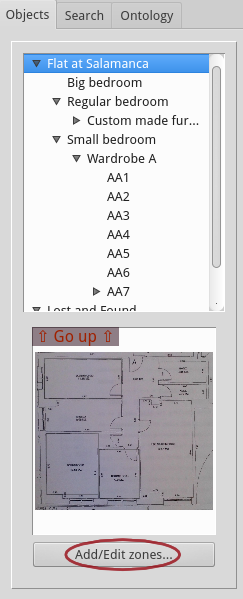
Those zones can be defined, moved and altered at will. You have to click on the Add/Edit zones... button to accomplish it.
You can define new zones by dragging. Changing shape of the old ones by dragging the small yellow circle on the bottom right corner of a selected zone. It is also possible to move them by dragging in a selected zone somewhere else. Zones can be deleted as well if they have no more use. The name the zone is pointing to (i.e. the object you will be led to if clicking the zone) can be changed directly in the table on the right part of the dialog.
Please also note the hints shown in the bottom line of the dialog.